
Workflow Trigger: TikTok Form Submitted
The Form Submitted Workflow Trigger will start a workflow whenever a form is submitted.
Contacts who submit forms will be added to the workflow, allowing you to set up a variety of follow-up actions once their form submission is completed.
This article will outline how to set up a workflow using the Form Submitted Workflow Trigger.
NOTE: This article will assume that you have customized forms already set up in your account. For an overview of how to create customized forms, see our article, “How To Customize a Form Or Survey”.
Steps to add the trigger to your workflow
Step 1: Start a new workflow or edit an existing one
Step 2: Creating and Editing the Trigger
Click on “Add New Trigger”
Select Form Submitted in the Contact Actions section of the Workflow Triggers Menu or use the search feature. Once selected, the Trigger setup menu will appear.

Note: You can change the display name of this trigger within the workflow builder under the Workflow Trigger Name textbox. This won’t change any content or functionality related to this trigger or workflow other than the display name of the trigger which is only displayed within the workflow builder

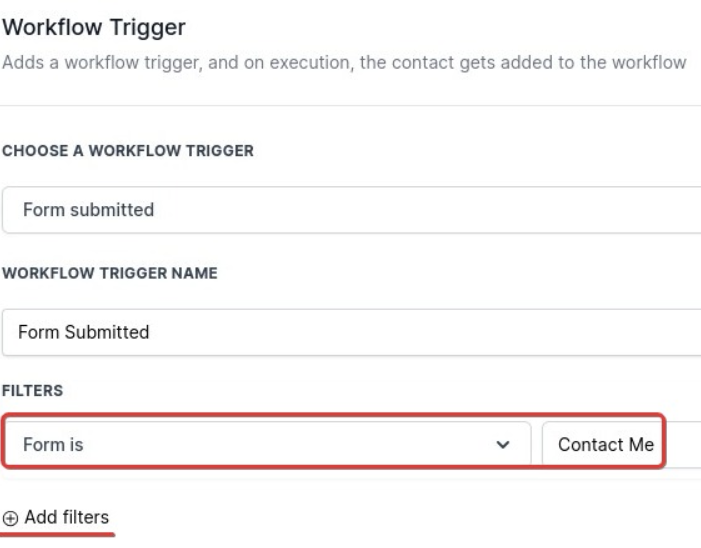
Press + Add filter to bring up the Filters section. We highly recommend filtering by the name of the form they will be optin in.
The Form is parameter allows you to only allow submissions of specified forms to trigger this workflow.
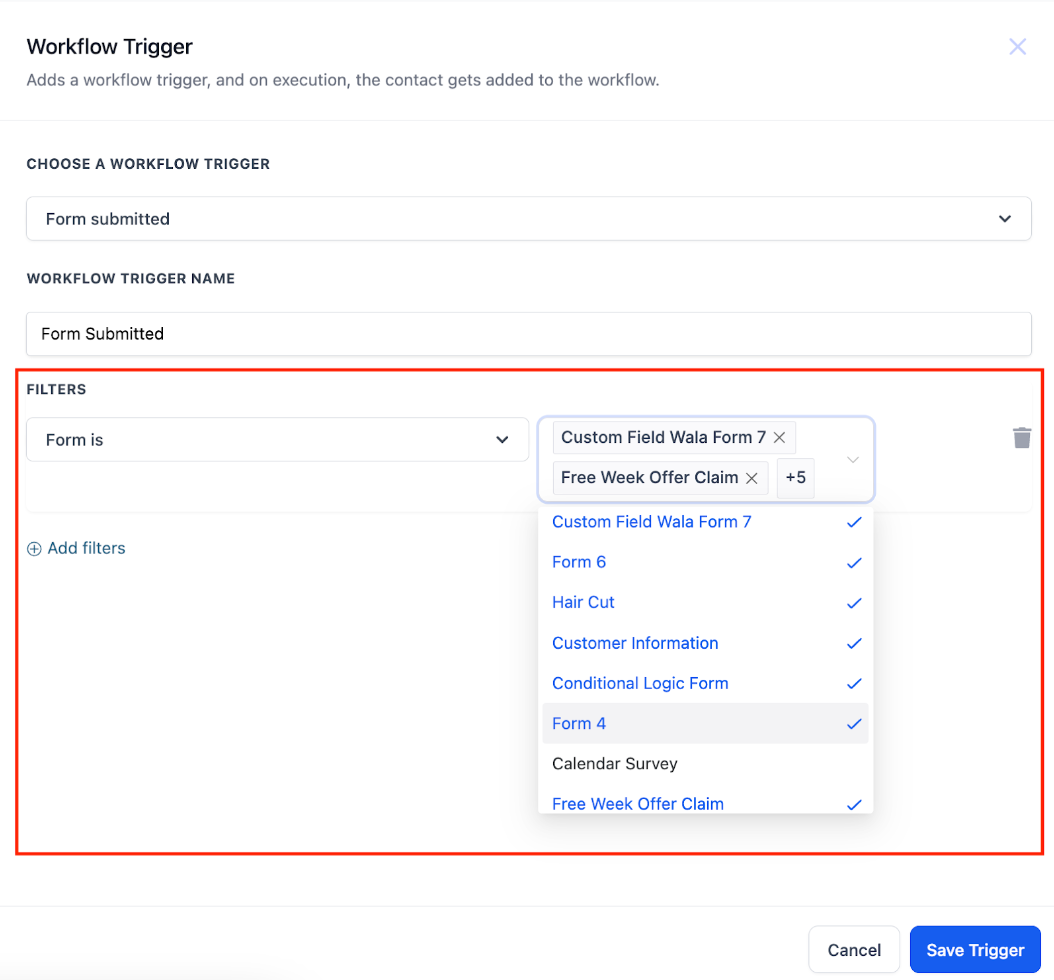
You can select multiple forms in the same filter.
Note: If you choose to leave the Filters section blank, then this workflow will be triggered by all Form Submissions from any contacts anywhere in your account.
Press Save Trigger in the bottom right corner of the Trigger setup menu

Step 3: Set up applicable Workflow Action(s). We have multiple articles available to explain the setup of each of the Workflow Actions. Feel free to review our articles on these for more information on setting these up.
Below is an example of how after they submit the form (trigger), a contact tag will be added (action).

Step 4: Press Save in the top right corner of your browser to save the workflow
If your Workflow is ready to be enabled, make sure the toggle switch under Save is set to Publish

Be sure to test your Workflow to make sure it is set up correctly using the Test Workflow button next to the Publish toggle switch.
For an in-depth overview of Workflow Testing see our article, “Using the Testing Features in Workflows”